Having been spurred on by this forum, I am now fixing the damp in my caravan. I've read through all the relevant posts, checked out Al, Neal, and the Wizard's websites, so I think I have a reasonalble idea of what needs to be done. I have two questions.
1. Is it necessary to replace the damp polystyrene, or can you just dry it out with a fan heater?
2. Has anyone worked out a way to take out the top lockers without damaging the roof? Mine appear to have been stapled through the roof during construction. The roof is sound, but I need the locker out to get access to the corners which are damp.
yes you can dry the polystyrene, I used an electric heat gun normally used for paint stripping , then a blow heater just to keep it warm whilst it dried out compleatly.
Q2
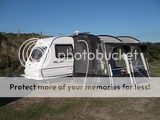
I opened the sides of the caravan as you can see on the website, I have worked out that the lockers are screwed in from the framework to the inside as well as from the outside to in as you can see in this pic.
That's good news about the polystyrene. I will probably have to replace some here and there, but much less work than the whole lot.
Re the top lockers, that doesn't sound so good. are you saying that to get them out without damaging the ceiling, I will have to open up the roof to get at any fixings going from outside to inside? I really don't want to go there if there is any other way.
Hi Simon, welcome to ukcampsite.co.uk, Als is certainly becoming the great authority on this kind of work.
Unfortunately by the very design of the caravan it does mean that removal or opening of the outer skin is needed to access the fixings of many of the internal fittings. Don't be too apprehensive though, Als will guide you through the whole process and your van will be more watertight when you finish the job than it was when it left the factory.
Good work Als, just been looking through the latest on the website, when you writing the manual! I want a copy, signed by you and Nettie of course!
Hi Simon,had a similar prob my self,if the wallboard is not totally spongy but is measuring damp on a meter then it may be possible to cut a series of 4cmsx6cms holes in the wallboard which you can cover at later date with vent covers.When you have cut the holes it will now be possible to insert a hairdryer nozle into them to speed up drying the panel.The holes will allow you to see if the frame is still ok also.As you have the holes in a locker covered with the vent covers it will look a very neat job without the trouble of removing the board.If the insulation and wall board are really damp and the frame has rotted then you will have to strip it right down
Hi Simon , first when you dry out the polystyrene don't get the heater too close to it as you wouldn't want to set it on fire .
Second , the only way i can think of , of getting the roof lockers off without opening up the outside of the caravan is to push a hack saw blade between the locker and roof / wall , then saw / slide the blade till you find each fixing point , then saw through it , it will take some time to do , but should release the lockers without to much damage to the roof / wall lining ( well that's my idea , worth a go ? you'll have to decide ) , the only problem i can think of is how will you re-attach the lockers afterwards .
I found my Avondales lockers were attached to the side walls with a plastic insert with a screw through it into the back wall this was then covered with a flat plastic cover, these were hardly noticeable and I only spotted them the second time I looked at how I was going to sort out my damp problem. It certainly saved me a lot of work.
I also have an avondale. I found the plastic inserts and removed the screws. The locker still seemed quite firmly attached so I carefully slipped a screwdriver under one end and prised it off, to find staples coming down through the ceiling panel into the top of the locker. Stopped at that point to consider what to do next. Was it the same on your avondale?
By the way folks, thanks for the welcome to this forum and the advice. it's comforting to know that there are others who have been in the same boat as me and successfully solved their problems!
In my van the lockers start about 1 foot from the front of the van, the first two lockers were all one piece with a division in the centre. The first locker door was solid the second glass, after i had removed all the screws i noticed there was movement in the locker, the centre dividing upright came out easily and had no staples into the roof, the end upright closest to the front of the van was stapled from above and had one screw, I prised this down but most of the staples pulled through the plywood. The decorative timber at the front of the locker was screwed and glued so after removing the screws I had to prise the wood apart. All the locker came apart and all I'm left with now is the top of the locker that attaches to the roof, this I left as it doesn’t impede on removing the wall panels. I cut the plywood with a Stanley blade straight down by the start of the cooker that’s about six feet from the front of the van and removed that panel. I found the water had leaked in the top corner and had worked its way down almost as far as the floor. I had to replace the top curved timber that the awning rail screws into, the window frame and the strip that the locker bottom/shelf screws into as all were rotten. I've just finished the re-panelling of the wall so the next job will be putting the locker back in. This is very hard to describe and it might become clearer when I start putting back in the locker, you can e-mail me directly if you want but sometimes its a good idea to keep these on the forum as it benefits others.
I've just read what I've just written and I can hardly follow it, so I hope it makes some sense,
A day of all things motorhome and campervan. The show is held both in the main indoor arena and across the grounds. Catering, hot drinks and food options are available. Easy access to the site and free parking included. Win one of five pairs of day tickets


 Topic: Damp - 2 questions