I shall include issues I encountered during the test pitch, how I overcame them, and a revised sequence of pitching based on what I have learnt from the test pitch.
More information with regard to the tent, purchasing process, pitching instructions from owners of Dutch pyramid tents could be found in this thread:
And Ratty, I shall submit my tent review later, promise!
DK
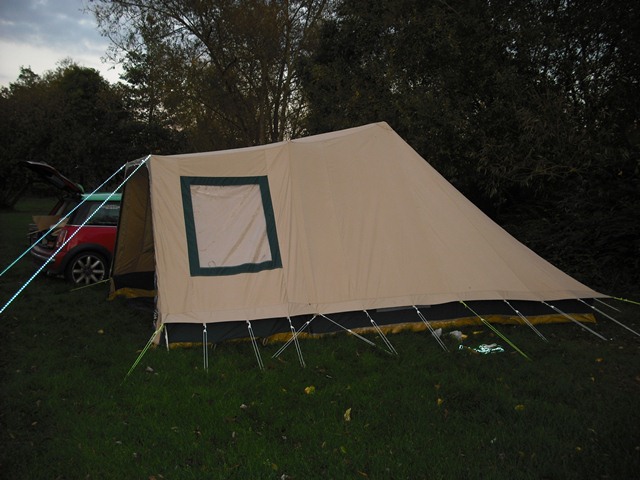
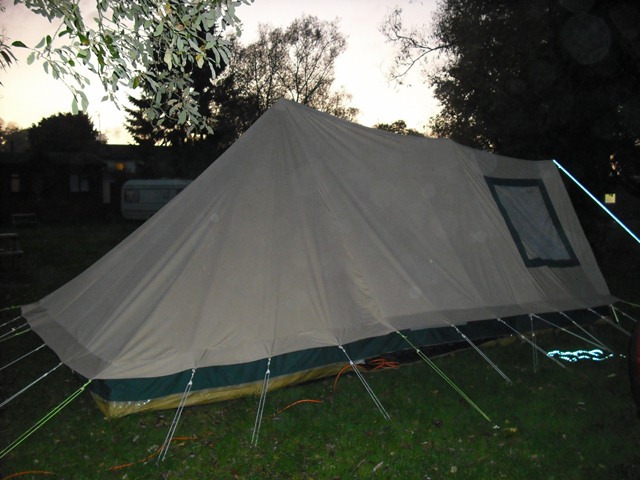
The canvas was a bit saggy in places, however, it was my first attempt, and with practice, I believe I should be able to achieve a taut and smooth look.
Post last edited on 20/10/2011 22:40:18
Post last edited on 20/10/2011 22:42:18
------------- Apple The Campervan - A Van For Work, Rest & Play!
- 2027: ? NL+DE+FR
- 2026: FR+DE
- 2025: 17/77
'24: 10/49; '23: 9/47;'22: 8/46; '21: 9/34
* Ex-tenter
* Treat life events like a dog: if you can't eat it, play with it or hump it, p1$$ on it and walk away!
Don't forget to leave a review of all tents you've used, for a chance to win fantastic prizes
------------- Apple The Campervan - A Van For Work, Rest & Play!
- 2027: ? NL+DE+FR
- 2026: FR+DE
- 2025: 17/77
'24: 10/49; '23: 9/47;'22: 8/46; '21: 9/34
* Ex-tenter
* Treat life events like a dog: if you can't eat it, play with it or hump it, p1$$ on it and walk away!
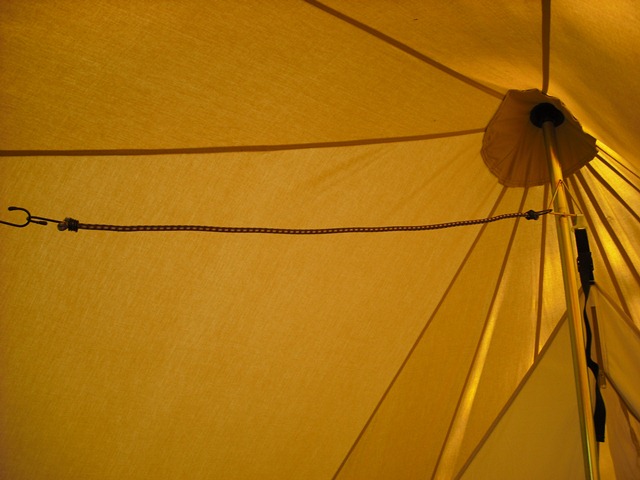
Inner tent hanging point, which is great for my work lamp, and I can create hanging lines by using bungees and cable ties.
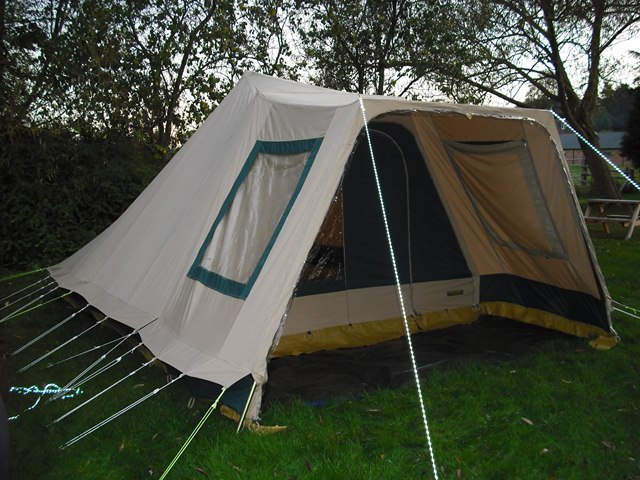
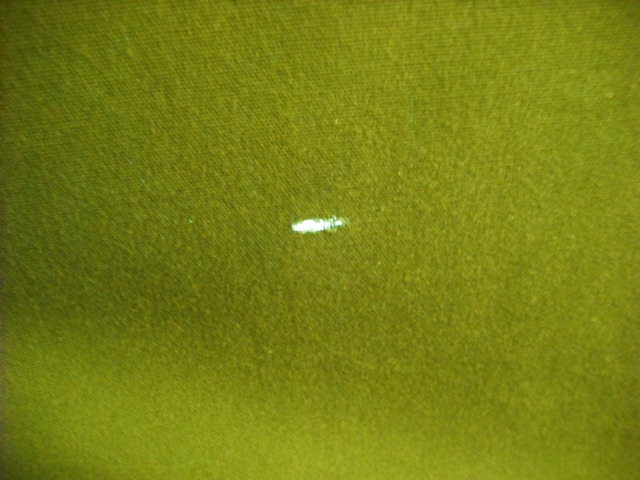
Imperfections in the canvas, one in the main canvas which has been patched, and a small one about 4mm in length in the door.
I have already purchased some iron-on fabric appliques so that I can put one over the hole on the door.
DK
------------- Apple The Campervan - A Van For Work, Rest & Play!
- 2027: ? NL+DE+FR
- 2026: FR+DE
- 2025: 17/77
'24: 10/49; '23: 9/47;'22: 8/46; '21: 9/34
* Ex-tenter
* Treat life events like a dog: if you can't eat it, play with it or hump it, p1$$ on it and walk away!
Issues discovered during the test pitch (in no particular order).
Fitting the inner tent after raising the central main pole in its final position
Once the central pole was up and the tent guyed, I discovered I was too short to hook up the inner tent without steps to help me.
Hence I had to lower the pole in order to hook up the inner tent, which was not easy to do when the tent fabric was taut.
Once I moved the central pole back into position, I discovered the central vertical zip on the inner tent was too slack.
I had to repeat the process of lowering the pole twice more in order to achieve the right tension for the inner tent.
I also discovered that fitting the inner tent after guying the canvas could result in slack points on the canvas, and had to re-tension certain guys on the canvas as a result.
Lesson learnt:
When raising the central pole for the first time, raise it to approximately 80 degrees from horizontal, this should still provide sufficient stability for the canvas while the inner tent is being installed.
Install the inner tent and hook it up to the main pole, lower the main pole if required.
Raise the main pole to its final position.
DK
------------- Apple The Campervan - A Van For Work, Rest & Play!
- 2027: ? NL+DE+FR
- 2026: FR+DE
- 2025: 17/77
'24: 10/49; '23: 9/47;'22: 8/46; '21: 9/34
* Ex-tenter
* Treat life events like a dog: if you can't eat it, play with it or hump it, p1$$ on it and walk away!
Don't forget to leave a review of all tents you've used, for a chance to win fantastic prizes
Instead of the recommended “main pole first” as instructed by the manufacturer, I decided to adopt the “front frame first” approach as recommended by a number of experienced Dutch pyramid tent owners.
During the course of the test pitch, after raising the maim central pole, I started to fit the middle frame (see separate section regarding fitting the middle frame), and realised there were sleeves in the canvas to hold the frames in place. DOH!
After fitting the middle frame, I decided to correct my earlier mistake with the front frame by not fitting it inside the sleeves, and found it a struggle with the canvas drapping over my head.
Lesson learnt:
Get it right first time with the front frame first.
DK
------------- Apple The Campervan - A Van For Work, Rest & Play!
- 2027: ? NL+DE+FR
- 2026: FR+DE
- 2025: 17/77
'24: 10/49; '23: 9/47;'22: 8/46; '21: 9/34
* Ex-tenter
* Treat life events like a dog: if you can't eat it, play with it or hump it, p1$$ on it and walk away!
During the test pitch, I found fitting the middle frame being the hardest of all the tasks.
I managed to fit it with relative ease when the pole was not fitted inside the sleeves in the canvas, and with the third party rain cowls holding the corner sections in place by fitting the rain cowls outside the canvas.
Since I found it difficult to push the rain cowls in place once the middle frame was pushed into position, I decided to fit the rain cowls that were supplied with the tent onto the spikes on the corner sections first before fitting the canvas over the spikes.
This way, the eyelets would fit snuggly over the rain cowls.
However, when I tried to fit the middle frame inside the sleeves without the help of rain cowls on the outside, I found it a real struggle.
I tried fitting the corner sections first, then the middle sections, and was unsuccessful, as it required significant upper arm strength in order to pull the canvas taut for the poles to slot in place in the middle.
After struggling with different approach without success, I remembered it should be easier to fit canvas over the frame when it was slack.
So I moved the legs of the middle frame so that the frame sat at an angle.
With one corner section in place, I pulled the canvas over the other corner section until the eyelet fitted over the spike. At last, result!!!
Lesson learnt:
Raise the middle frame so that it sits at an angle before fitting the canvas over it.
Care needs to be taken though when pulling the canvas over the second spike on the middle frame so as to prevent putting too much stress on the stitching.
DK
------------- Apple The Campervan - A Van For Work, Rest & Play!
- 2027: ? NL+DE+FR
- 2026: FR+DE
- 2025: 17/77
'24: 10/49; '23: 9/47;'22: 8/46; '21: 9/34
* Ex-tenter
* Treat life events like a dog: if you can't eat it, play with it or hump it, p1$$ on it and walk away!
Fit the front panel when the middle frame is in the lowered position
Unless one has great upper arm strength, I would recommend for the front panel to be fitted when the middle frame is in the lowered position.
This would also prevent excess stress on the zip.
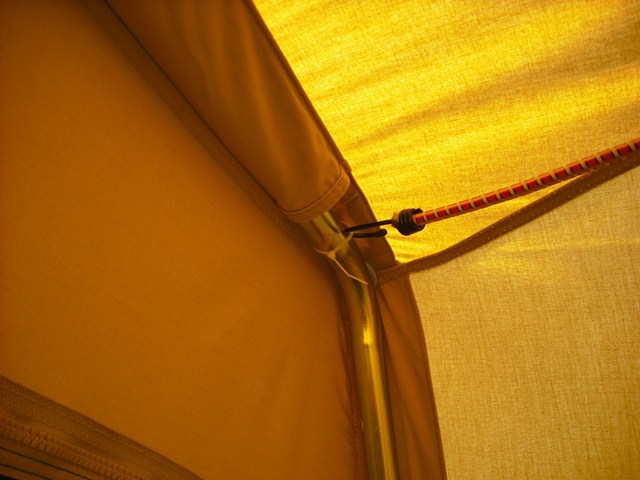
Rain cowls to be fitted under the canvas
See also section on fitting the middle frame.
The rain cowls supplied with tent are tapered to fit inside the eyelets snuggly to prevent water running down the poles.
It was very difficult to try and fit the rain cowls snuggly against the canvas when they were fitted onto the canvas.
Peg the groundsheet in place before guying the canvas
During the test pitch, I guyed the canvas first before pegging down the remaining eyelets on the groundsheet, and found the guys on the canvas getting in my way.
Hence I would definitely recommend pegging down the groundsheet completely as it is generally advised before guying the canvas.
DK
------------- Apple The Campervan - A Van For Work, Rest & Play!
- 2027: ? NL+DE+FR
- 2026: FR+DE
- 2025: 17/77
'24: 10/49; '23: 9/47;'22: 8/46; '21: 9/34
* Ex-tenter
* Treat life events like a dog: if you can't eat it, play with it or hump it, p1$$ on it and walk away!
Don't forget to leave a review of all tents you've used, for a chance to win fantastic prizes
Mark up and differentiate sections of the poles according to their positions
The middle two sections of the frames are not interchangeable and are numbered differently.
Unless one carries the instruction with him/her all the time, it would be very easy to mix these sections up.
I resolved this issue by marking these sections with “F” for front and “M” for middle on the numbered stickers.
Leave plenty of spare length for tension adjustment on the guys
Otherwise one would end up pulling the pegs out to reposition! DOH!
Make sure the zips are closed properly, with the hooks in place, before guying the canvas
I forgot to hook up all the hooks on the ground sheet and front panel before guying the canvas, and found the door did not open and close smoothly, DOH!
DK
------------- Apple The Campervan - A Van For Work, Rest & Play!
- 2027: ? NL+DE+FR
- 2026: FR+DE
- 2025: 17/77
'24: 10/49; '23: 9/47;'22: 8/46; '21: 9/34
* Ex-tenter
* Treat life events like a dog: if you can't eat it, play with it or hump it, p1$$ on it and walk away!
My sequence of pitching after resolving the issues above.
1. Assemble the poles
2. Peg down additional groundsheet if used
3. Roll out the groundsheet on top of the additional groundsheet
4. Peg down the four corners of the groundsheet
5. Roll out tent canvas (minus the front panel) on top of the groundsheet
6. Zip the canvas onto the groundsheet
7. Peg out the four corners of the canvas loosely
8. Fit the front frame onto the canvas
9. Guy out the front frame loosely
10. Fit the tent carpet if used
11. Raise the central main pole to approximately 80 degrees from horizontal
12. Bring the EHU kit inside the tent, unroll the cable, and feed the socket through the opening where the zips meet at the back of the tent
13. Position the EHU cable to one side of the tent
14. Fit the inner tent, and hook it up to the main pole
15. Raise the main pole to its final position
16. Fit the middle frame and raise it to a lowered position
17. Zip on the front panel
18. Raise the middle frame to position
19. Close the zips fully and hook up all the hooks on the groundsheet and front panel
20. Peg down the remaining eyelets on the groundsheet
21. Peg down the canvas, starting with the one in the middle at the back, then the middle one on each side, alternate between back, right and left etc., until all the guys are in place
22. Adjust the position of the front frame and guys
23. Adjust the guys on the canvas until it is taut
24. Fit the front groundsheet section if use
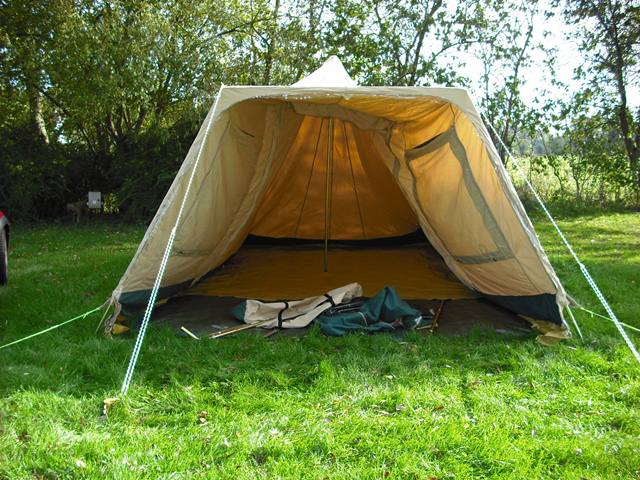
I am only 5'2", female, nearly 50, and relatively fit, and managed to pitch this tent on my own.
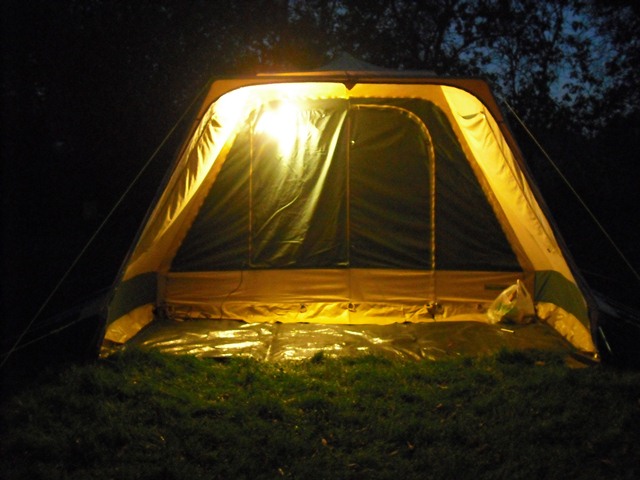
Raising the main canvas without the front panel was much easier than I had expected.
As already mentioned above, fitting the middle frame was the hardest for me. However, I know it is doable as I have done it.
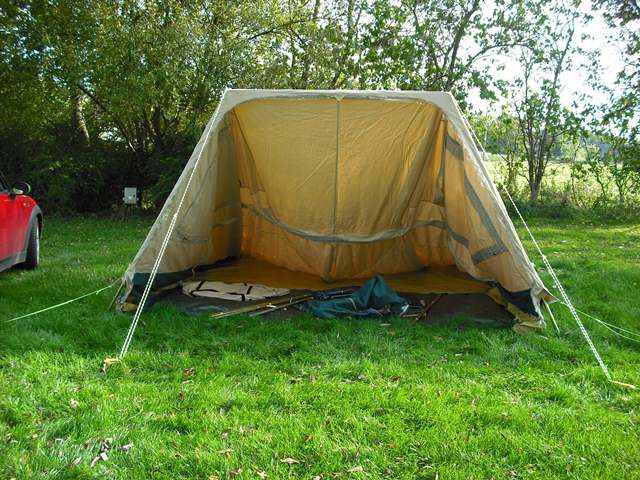
It is very spacious for just me and my dog, and can easily accommodate another person if required.
All in all, I am very satisfied with my new purchase, and would have given it a 10/10 if the imperfections on the canvas do not exist.
As it is, I would give it a 9/10.
I hope this helps for anyone who may be considering a Dutch pyramid canvas tent in future.
Feel free to ask any questions and I'll see what I can do to help.
Thanks to all the contributors in the "Cabanon vs Hypercamp" thread - I would not have done it without you!!!
DK
------------- Apple The Campervan - A Van For Work, Rest & Play!
- 2027: ? NL+DE+FR
- 2026: FR+DE
- 2025: 17/77
'24: 10/49; '23: 9/47;'22: 8/46; '21: 9/34
* Ex-tenter
* Treat life events like a dog: if you can't eat it, play with it or hump it, p1$$ on it and walk away!
Your tent looks lovely. I've been following your posts (started on the other thread )and it's great to see the final tent. Well done you for managing to erect it on your own. I'm sure other will find your instructions useful. Thanks for posting the pics.
Quote: Originally posted by dk168 on 20/10/2011
Imperfections in the canvas, one in the main canvas which has been patched, and a small one about 4mm in length in the door.
I have already purchased some iron-on fabric appliques so that I can put one over the hole on the door.
DK
[/QUOT
If you don't mind me asking, why are you happy to accept a brand new tent with such faults in the canvas? Surely it would be better to point these out to the supplier and ask for a replacement tent?
If we accept flawed quality items, then quality control just goes out of the window and suppliers can send out what they want, surely? By refusing to accept flawed new goods, standards can only improve for customers.
Just my opinion. I think you pay good money and you have a right to expect a tent without flaws in the canvas that you have to stick 'iron on appliques' over, to hide! (Not sure it's wise to iron canvas, either.)
Don't forget to leave a review of all tents you've used, for a chance to win fantastic prizes
I agree with Ellesbelles1, if you paid full price for the tent then it should not have any imperfections or damage. I would email the photos to Obelink and ask them how they can rectify the matter.
When I decided to purchase this tent, I was already made aware that its quality is unlikely to match those that cost double or more.
Also, I am aware that if there are any issues with the tent, the process of getting a replacement etc. would involve a lot of hassle, time and effort.
On balance, the flaws are minor, and I can live with them.
I guess I should inform Obelink about the issues with the flaws, however, I do not expect them to compensate me.
Life is too short to let something trivial like this to bother me.
DK
------------- Apple The Campervan - A Van For Work, Rest & Play!
- 2027: ? NL+DE+FR
- 2026: FR+DE
- 2025: 17/77
'24: 10/49; '23: 9/47;'22: 8/46; '21: 9/34
* Ex-tenter
* Treat life events like a dog: if you can't eat it, play with it or hump it, p1$$ on it and walk away!
Besides, canvas is made of cotton, and can be ironed, and the appliques will look kind of cute on the door!
DK
------------- Apple The Campervan - A Van For Work, Rest & Play!
- 2027: ? NL+DE+FR
- 2026: FR+DE
- 2025: 17/77
'24: 10/49; '23: 9/47;'22: 8/46; '21: 9/34
* Ex-tenter
* Treat life events like a dog: if you can't eat it, play with it or hump it, p1$$ on it and walk away!
Amazing family weekend with old steam engines, classic car displays, market stalls, and full catering and bar. And camping on site - Save £25 by booking in advance.