I've been bragging a bit on here about my Concorde and how we're getting on towards 100 nights without a sniff of trouble. Well, 85 nights in we've had two days of hottish weather and . . . .
The Bulges of Doom appeared:
KUDOS at this point to Gary Cross, who answered my worried e-mails with info and tips without which we'd probably be at home by now, rather than looking forward to another week on site.
DISCLAIMER: the methods described here have kept our tent up for less than 12 hours at time of writing.
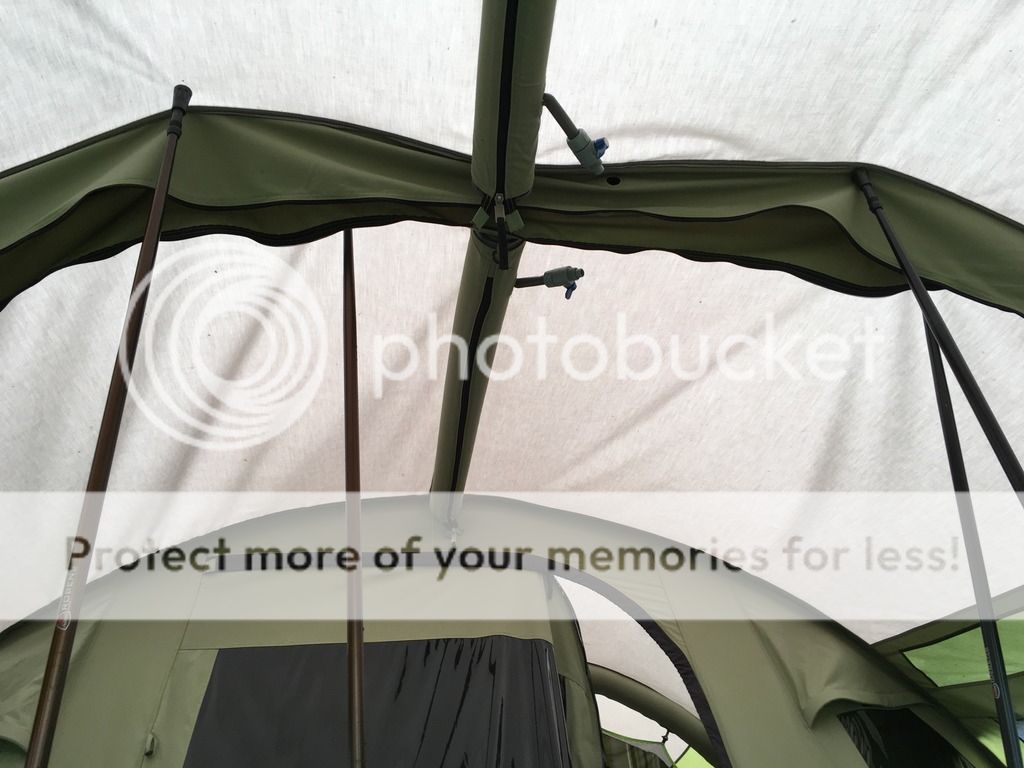
We splinted round the beam with extendable poles to keep the canopy up, then isolated and deflated the beam before disconnecting the ridge valves, unzipping the tent sleeve and dropping out the beam.
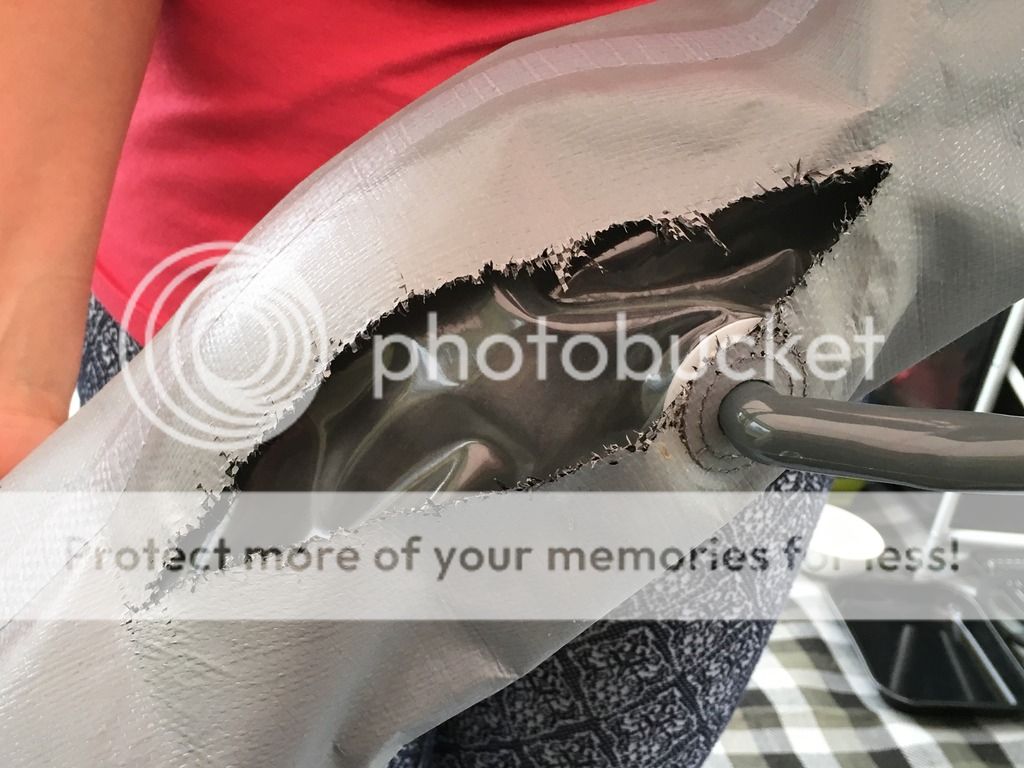
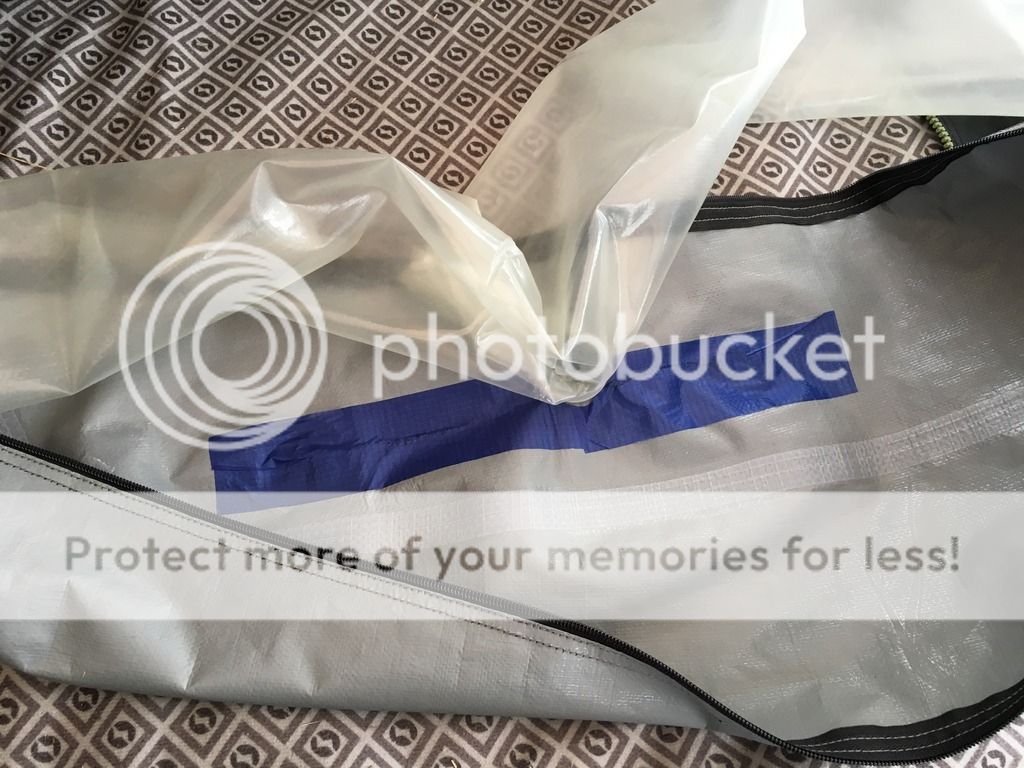
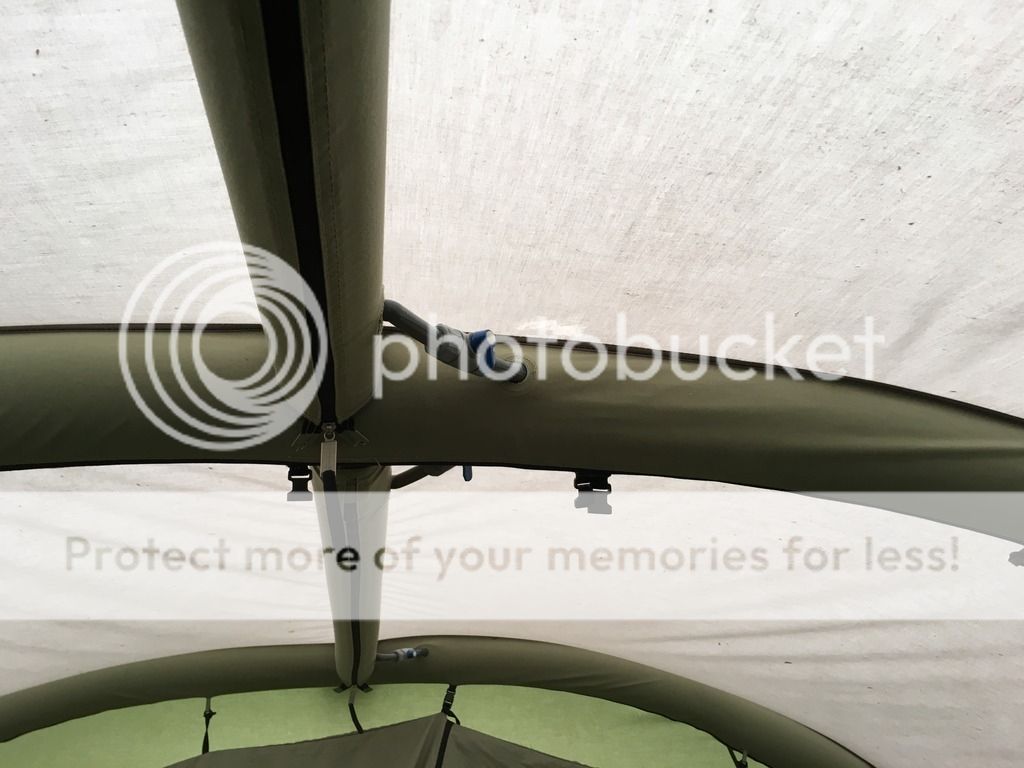
This is what we found:
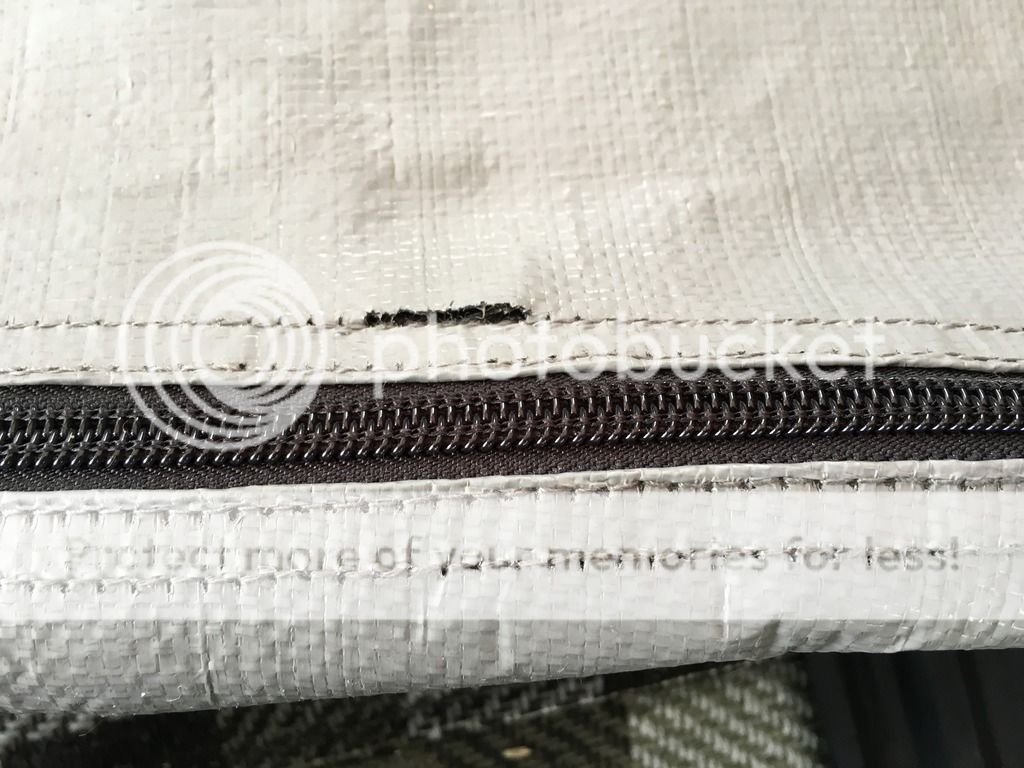
In all cases it was the stitching which had given way - usually around the valve points - and the split had propagated from there. We found small tears running parallel to the zip in a few places too.
Choice of tape for the repair is probably quite important. We wanted something tough and flexible, able to cope with moisture, and ideally resistant to abrasion and of course extremes of temperature. Stormsure's Tuff Tape looked ideal, but we couldn't get it locally. I figured some kevlar/mylar sail repair tape would be as good and headed out to find a yacht chandler's. The sail tape I ended up with is gossamer light, so I got 10 metres of Duck Ultimate duct tape to give it some encouragement. Both are in 2" widths.
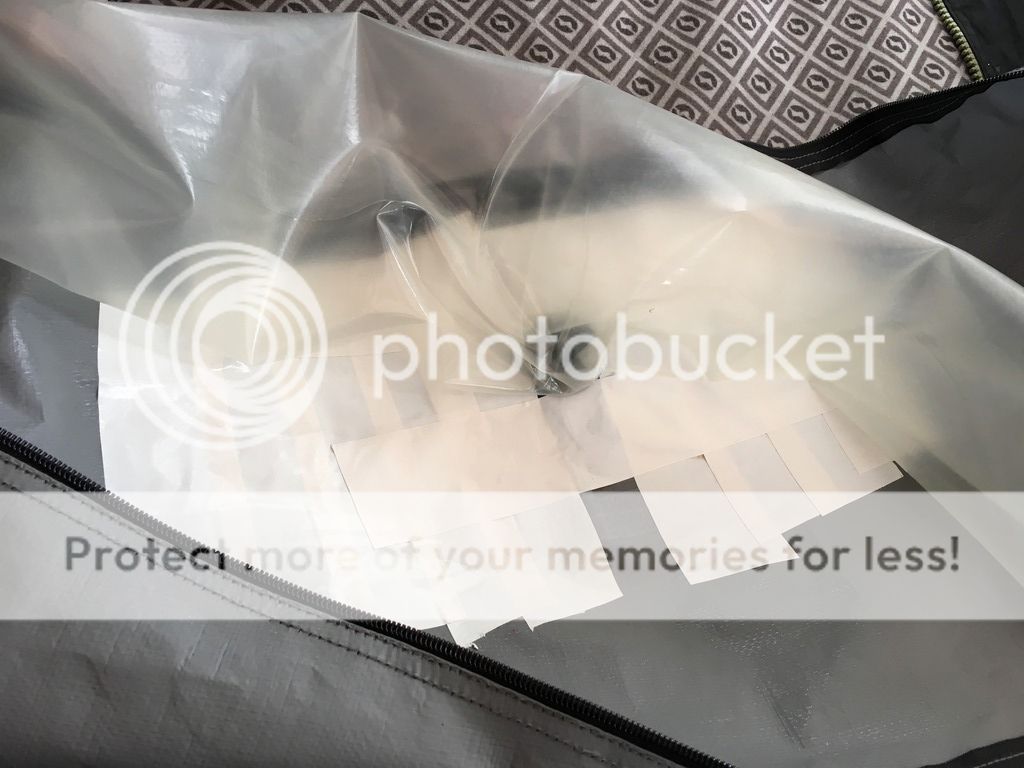
First we sail taped the outside of the split:
Then the inside:
To get at the inside, you'll need to unzip the grey sleeve. You may find this is secured with a tiny cable tie to stop the zip riding back. I'd advise replacing this when you've finished the repair. String or cotton would do if you can't get hold of a tiny cable tie, but Halfords or similar will oblige.
Next, duct tape the inside:
Zip the bladder back into the sleeve. Don't let it get twisted. There will probably be a weld running down the spine, which should help you.
Now: moment of truth #1.
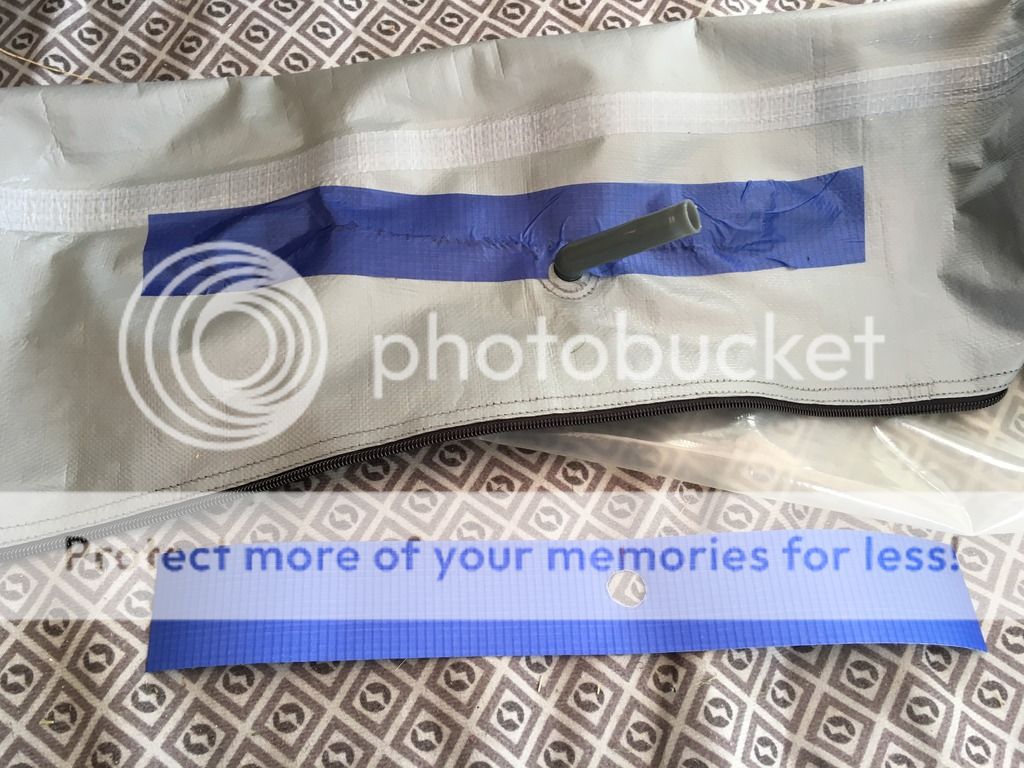
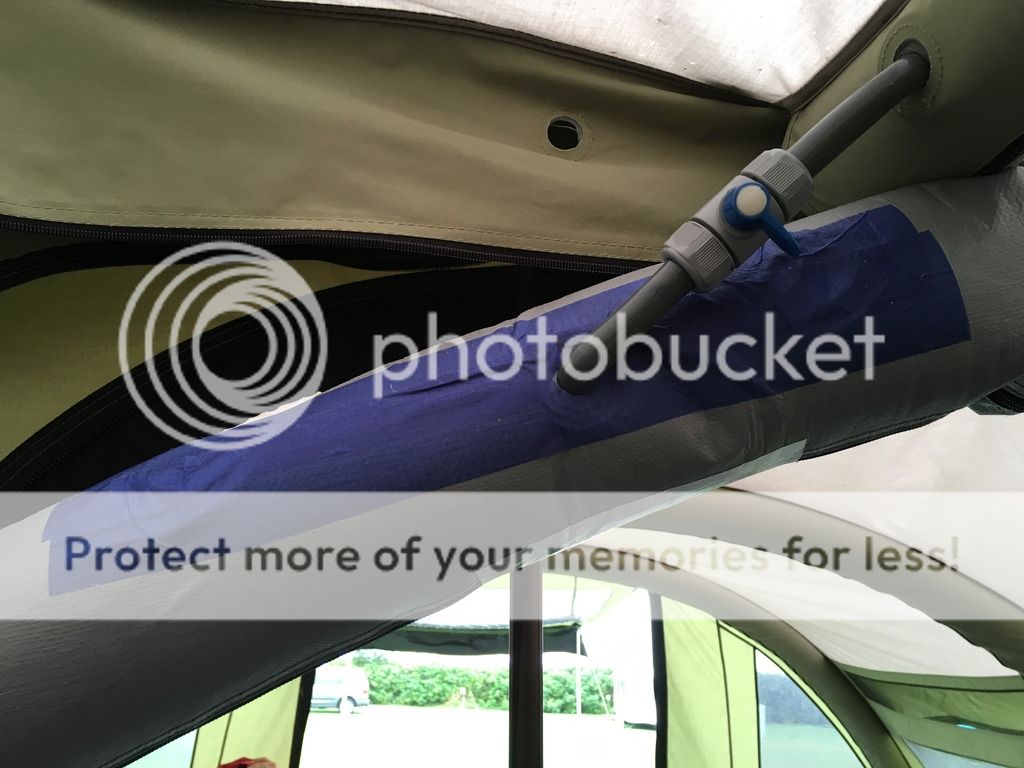
With the air beam outside the tent sleeve, reconnect the ridge beams (if it's a one-point inflation system) and close the deflation valve outside (trust me, you'll feel a right git if you forget this bit). Inflate the tube just enough for it to get its shape. For me this was less than 2psi. If you've got a one-point inflation system you should be able to do this by bleeding air across from the other beams. It should now look a bit like this:
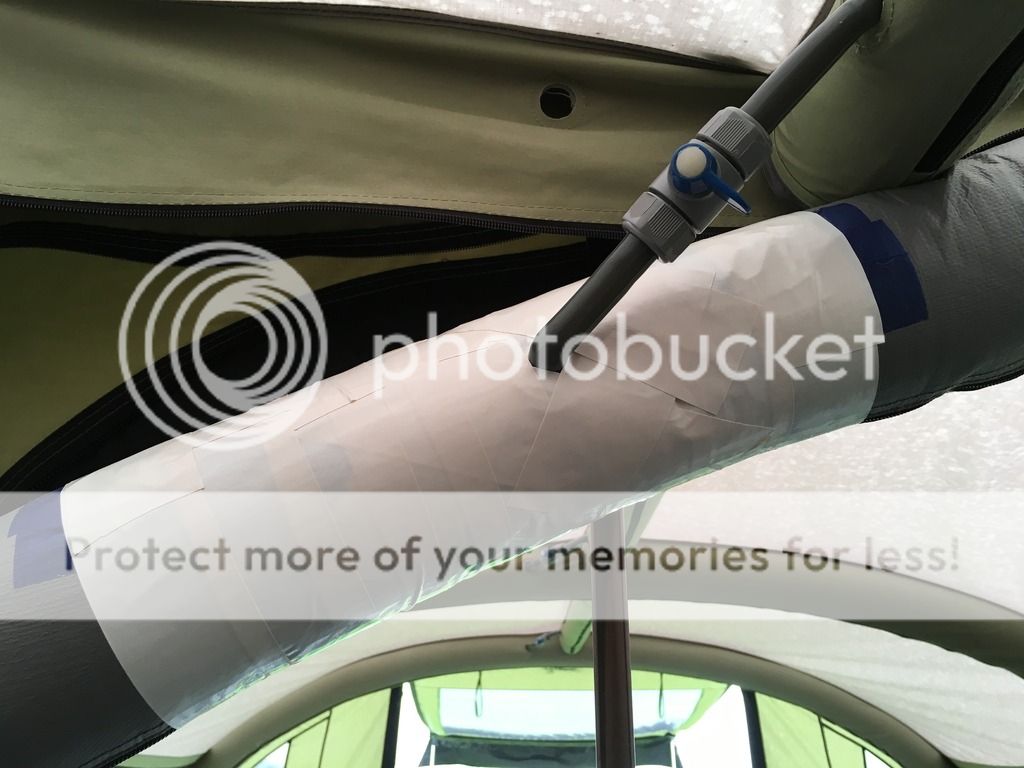
As neatly as you can, wrap duct tape round the beam, covering the length of the sail tape repair. This is the bit which gives the repair its strength, so try to keep it even and avoid wrinkles. This was my effort:
All that remains is to get the beam back into the tent sleeve and pump it up. For one-point inflation tents that means another bout of faffing with the valve connectors.
Now double check you haven't got it twisted, and do the zip back up.
Pump, listening for anything odd. Have someone inside watching for anything odd. The likelihood is that your repair is stronger than the rest of the beam system. It will certainly behave differently, which is probably not ideal, but your Bulge Of Doom should now look like this:
Don't worry if the shape is a bit wobbly: the internal bladder will cope as long as it's supported by your tape.
For the tears in the zip seams I did the same routine, but used 1" Gorilla tape for the initial fix parallel to the zip, with the sail tape and duct tape combo on the outside and spanning the zip.
General lessons learnt:
Underinflate by 20% or more if hot weather is forecast.
Give your beams a quick visual check from time to time.
Once a season, inspect each beam properly by dropping the pressure, unzipping the tent sleeve and having a good look, paying particular attention to the stitching.
If you hear an unusual noise from the tent fabric, don't ignore it: the next noise might be a bang.
If you do see anything bulgy, drop the pressure as far as you can and isolate the beams.
Carry a 10 metre roll of good quality 2" cloth tape.
Post last edited on 20/08/2016 01:00:17
Don't forget to leave a review of all tents you've used, for a chance to win fantastic prizes
Far from impressed with the actual beams, of course, but have to say that is one of the best posts on here. Very informative and detailed, with step by step pics. And of course, very much on topic these day's, so will be extremely useful to many.
Well done on the repair (and for having the sense to check with Gary first!), and a massive well done on telling (and showing) us all about it. At times like these, taking pics and thinking of others isn't always at the top of the agenda, so a massive to you, sir!
Great repair job - this will be so useful for airbeam owners facing problems in the field, especially those with a linked beam system like yours, where just buying a spare beam is not really an option.
I wonder if Outwell have made airbeams to fit older models using their new tube design (that inner sleeve that failed is more of a rubbery material now I believe, with no weave in it to split).
Tim did this happen on Thursday? We spent the day on the beach and when we got back to site I thought your tent looked an odd shape. Hope you enjoy the rest of your holiday
Don't forget to leave a review of all tents you've used, for a chance to win fantastic prizes
Purplebean, yes it happened on Thursday. You must've come back just after I'd deflated the awning's centre beam for a closer look. Now that was an anxious moment. Great to meet you in person and I hope you enjoyed Annstead.
Hi PB. Yes, we're still here and the repairs are holding up thanks (four of the five beams were knackered).
We've had alternating sunny and wet days so it's been beach - castle - beach - castle - beach etc. The owners seem to have got their harvest home safely & the site's still full, so Annstead's happy all round. Fingers crossed for a dry pack up.
1. Really excellent post - the instructions and photos are likely to be really useful for people
But.....
2. It's incredible to hear that many people are finding air beam tents to have such problems. To think that a fairly new tent costing around £1k to £1.5k can have most of its beam sections develop faults, just because the day is above average temp (warm rather than roasting)......
Personally I've never gone for an air beam tent, mostly because I would be worried that some campsite lout could so easily burst a beam with a pin, but also because of the combined weight of a good polycotton tent in a SIG format.
Does having an air beam really save so much time? Even with a large and heavy cotton tent, I still find that most of the work is associated with unpacking and packing up kit rather than pitching/striking the tent or dealing with poles.....
------------- MAY 2017 - Loch Ken, Scotland
JUNE 2017 - Sango Sands, Durness, Scotland
AUGUST 2017 - Balloch O Dee, Galloway and Invergarry
SEPTEMBER 2017 - three brief trips
OCTOBER 2017 - hopefully one final trip before Halloween
Don't forget to leave a review of all tents you've used, for a chance to win fantastic prizes
Thinking about it, the tears in the beam sleeves probably developed over several months, and the hot, still weather was enough for the bulges to form. We were lucky that the outer tent sleeves held it all together.
Pumping up the tent the last few trips, it's been noticeably "floppier" and needed encouragement to get standing (ahem). I reckon that was probably down to damaged beam sleeves and is definitely a sign I'll be looking out for in future.
It's certainly eyebrow-raising that these tents went to market, but the fact is I'll get another polycotton air tent when our repairs give up. The construction has improved since ours was made, but the main selling point is the ease (not necessarily the speed) of pitching single handed in any weather.
Quote: Originally posted by Babywhale on 27/8/2016
Does having an air beam really save so much time? Even with a large and heavy cotton tent, I still find that most of the work is associated with unpacking and packing up kit rather than pitching/striking the tent or dealing with poles.....
No.
Depending on which tent and/or pump you have, you could save effort (electric pump?), but little difference in time, in my opinion.
Whilst our tent is inflating, I attach all the required guylines, and lay out all required pegs etc, so that saves ME time... but of course, for most, their guys are already attached.
By the time I've got my Karsten (Pod only) up, guyed, and secure, plus dividing curtains up (nearest we get to a bedroom!), I reckon I could have got my (3 x poled) Frinton up to the same stage (which already has the bedroom inner fitted). Maybe, as the Frinton required more pegs/guys, My Karsten may be 5 mins quicker at the most.
Without a powered pump? Don't know... never tried it!
Similarly, if I compared our full set up (Inflatable Karsten pod with poled awnings) with our previous 6 berth/5 poled polycotton Filey, again little difference, I'd say. The main advantage there would be I no longer "need" to set a tarp up, which I did with the Filey (for a proper holiday), so a good 20 mins saved there, I guess.
Inflatables do come down a bit quicker than taking out and folding up poles though, so you can get home 5-10mins quicker!!
They survived the pack up. They were noticeably stiffer when rolling up, but everything still went into the bags just fine, even with two carpets in situ.
Having put the tent and awning up to dry, it was a lot perkier than it was before, so I'm confident that its earlier floppiness was down to the beam damage. So if your air tent is reluctant to get up on its feet, check your beams!
One last thing - it went up to full pressure without issue.
Great post much appreciated although our issue was just the beam not near the valve the tearing was the same I happened to have duct tape with me by chance and after reading this decided to give it ago the wife and I isolated the tube dropped the pressure and rolled a good few layers of tape around the torn section trying to keep the same size as the tube then re inflated this seems to have worked a treat but as we have lots more hot weather and only 2 days into my 2 weeks in st Agnes we are hoping it lasts !!! Can I also say I find it amazing you can't buy these beam replacements easily I even phoned Denmark to talk to outwell and was redirected to Scottish mountain gear who told me I'd be looking at 2-3 weeks for replacement this I find shocking seriously thinking or going back to ridged poles I never fretted over my bear lake in the heat lol
Amazing family weekend with old steam engines, classic car displays, market stalls, and full catering and bar. And camping on site - Save £25 by booking in advance.